Azure Automation – How to Start/Stop VM (Classic)
Hey guys, today I wanted to share with you how to setup and start your first Azure Script which will allow Start and Stop your VM based on a timer.
1. Create a Certificate
The first thing we want to do is to create our Certificate and import it to Azure and for this we need a webserver such as IIS.
1.1 Install IIS
As I am running a Windows Server 2012 r2 I can either install the IIS 8 by server manager or use PowerShell. In my case I choose the second option
Install-WindowsFeature Web-Server –IncludeManagementTools
1.2 Create a Self-Signed Certificate
From theServer Manager tool, click on the Tools menu in the top-right menu bar and select Internet Information Services (IIS) Manager.
Click on your server name in the connections panel.
If prompted to Get started with Microsoft Web Platform, click the No
In the center panel of the Internet Information Services (IIS) Manager tool, double-click on Server Certificates.

In the Actions panel located at the right, click Create Self-Signed Certificate. When prompted, enter the following information:
Friendly name for certificate: Azure Automation
Certificate store: Personal
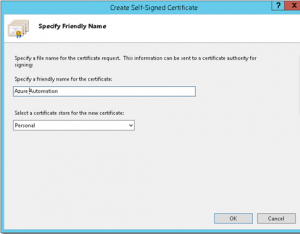
Click the OK button to generate the new self-signed certificate.
1.3 Export Certificate
On the Server Certificates page, right-click on the Azure Automation certificate and click on View…on the pop-up menu.
On the Certificate dialog box, click the Details tab and then click the Copy to File…
This will launch the Certificate Export Wizard.
Navigate through the Certificate Export Wizard using the Next button.
When prompted, enter the following information:
Export Private Key: No
Export File Format: default (DER encoded binary X.509 .CER)
File name: c:\AzureAutomation.cer

After specifying all of the above information, click theFinish button to complete the export process. Click the OK button twice to dismiss each open dialog box.
On the Server Certificates page, right-click on the Azure Automation certificate and click on Export…on the pop-up menu.
In the Export Certificate dialog box, enter the following information:
Export to: c:\AzureAutomation.pfx
Password: Enter and confirm a password to protect the Private Key exported in this certificate file.
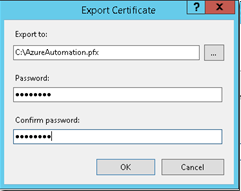
After specifying all of the above information, click the OK button to complete the export process.
2. Import Certificate to Azure
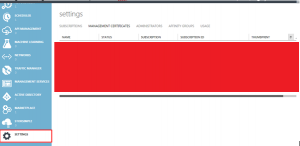
Log on the Azure Portal https://portal.azure.com or the old version https://manage.azure.com
Navigate to Settings > Managed Certificate (upload the .cer)
3. Setup Azure Automation
3.1 Create your Assets
Create the certificate variable
Select Automation (left sidebar) then go on Asset sub menu.
Click on Add Settings> Add credentials
Choose the Certificate and browse to find the .pfx
Create other variables
CertificateName = the one displayed under Name collumn
SubscriptionID = The one displayed under SubscriptionID
SubscriptionName = The one displayed under Subscription
VM1 = name of VM
ServiceName1 = name of cloud
3.2 Create your two first Runbook
Click on Runbook
Name this runbook as Start-VM. This PowerShell just connect to the right subscription, using the right certificate and Start the VM with VMName/ServiceName (setup previously in Assets)
workflow Start-VM
{
$subscriptionName = Get-AutomationVariable -Name “SubscriptionName”
$subscriptionID = Get-AutomationVariable -Name “SubscriptionID”
$certificateName = Get-AutomationVariable -Name “CertificateName”
$certificate = Get-AutomationCertificate -Name “Cert”
$VMName = Get-AutomationVariable -Name “VM1”
$ServiceName = Get-AutomationVariable -Name “ServiceName1”Set-AzureSubscription -SubscriptionName $subscriptionName -SubscriptionId $subscriptionID -Certificate $certificate
Select-AzureSubscription $subscriptionName
Start-AzureVM -Name $VMName -ServiceName $ServiceName
}
Save it.
Click on Runbook
Name the second runbook as Stop-VM. This is the same script than Start. The only difference is the command Stop-AzureVM instead of Start-AzureVM
workflow Stop-VM
{
$subscriptionName = Get-AutomationVariable -Name “SubscriptionName”
$subscriptionID = Get-AutomationVariable -Name “SubscriptionID”
$certificateName = Get-AutomationVariable -Name “CertificateName”
$certificate = Get-AutomationCertificate -Name “Cert”
$VMName = Get-AutomationVariable -Name “VM1”
$ServiceName = Get-AutomationVariable -Name “ServiceName1”Set-AzureSubscription -SubscriptionName $subscriptionName -SubscriptionId $subscriptionID -Certificate $certificate
Select-AzureSubscription $subscriptionName
Stop-AzureVM -Name $VMName -ServiceName $ServiceName -Force}
Save it.
3.2 Setup Azure scheduler task
Click on Schedule and link an existing schedule (in my case I already have one) or use link to a new schedule.

When this done with one Runbook, do it for the second one.
We achieve the goal and thanks to these 2 Azure Runbooks our business is saving 8 hours per day which is a decreasing of 30% on the Azure bill. Pretty cool, isn’t it?
 Next Post