Azure Automation – How to Start/Stop VM (Resource Manager)
Hi guys, previously I have created an article for explaining how to start and stop classic VM based on PowerShell. Nowadays we have access to the new portal http://portal.azure.com with new Azure VM available and you can choose the option to get a resource manager for it.

This is really nice to have when you want to manage your resource as a group. You can deploy and update all the resources for your solution in a single, coordinated operation.
For Automation this make your life easier as you do not need to create a certificate or other variables for it.
It will create an AzureRunAsConnection which will handle it for you.
Let’s have a look at the steps and see how quickly we can deploy our PowerShell scripts.
1. Creation of a new Automation account
Automation is not available in every Microsoft Cloud so I am going to choose just the closest from I am.
Type “create automation” in the Azure search bar (1) then type type automation as below (2) and select it from the result (3). Review information on the right hand-side and click on create (4)

Wait for the successful message. This will create your automation account with some tutorials scripts (kind of nice when you want to test).
2. Create your first runbook
The first runbook will be able to start your VM. Let’s select the right new automation account and click on runbook, then click on Add a runbook.
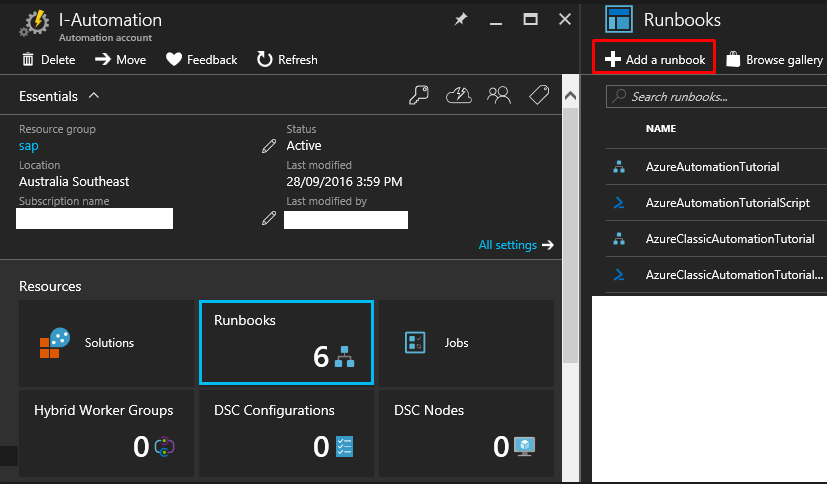
Give it a name and choose PowerShell as Runbook type.
Now here is the code you will need to handle the Start of a VM.
$connectionName = “AzureRunAsConnection”
# Get the connection “AzureRunAsConnection “
$servicePrincipalConnection = Get-AutomationConnection -Name $connectionName
“Logging in to Azure…”
Login-AzureRmAccount `
-ServicePrincipal `
-TenantId $servicePrincipalConnection.TenantId `
-ApplicationId $servicePrincipalConnection.ApplicationId `
-CertificateThumbprint $servicePrincipalConnection.CertificateThumbprint#Declaring the Dictionary object to store VM Names along with their Resource group names
$VMList = @{}#Adding VMs to the VM List
#Replace the VM Name and Resource Group name with your environment data
$VMList.Add(“YourVM_Name”, “Your_ResourceGroup”)$VMList.Add(“YourVM_Name2”, “Your_ResourceGroup2”)
#Getting the VM object using Get-AzureRmVM and then starting the VMs
$VMList.Keys | % {Get-AzureRmVM -Name $_ -ResourceGroupName $VMList.Item($_)} | Start-AzureRmVM
Write-Output “All the VMs have been started successfully”
Let’s explain what everything does. First thing we are doing is creating and calling our variable AzureRunAsConnection which as said previously will take care of your certificate so you basically do not need anything else and can always start by this.
Second step we are authenticating ourselves with the right TenantId, ApplicationId and CertificateThumbprint. Same for this part, there is nothing to change.
Next part, here is the time to declare our variable VMList that we will use to store all our VM we want to start at the same time. We will only need to specify the VM Name and Resource name as above.
Finally the Get-AzureRmVM followed by Start will do the job.
You might like to test it before going further.
Check your VM Status from portal or PowerShell commands.
3. Create a scheduler
When you are happy with the result, go ahead with the scheduler.
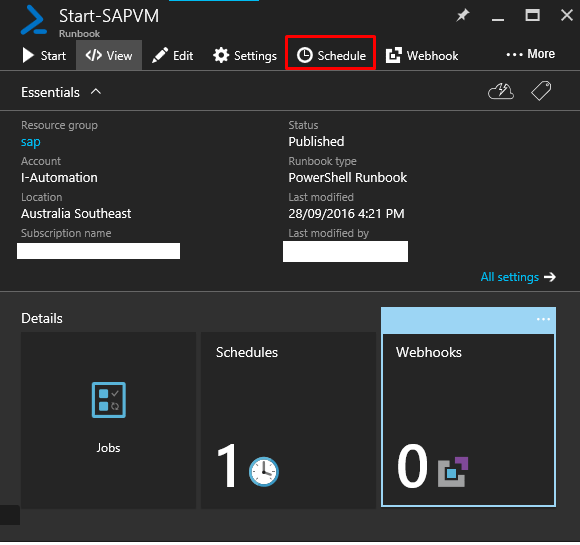
Click on Schedule and choose a time/recurrence.
Now you can do the same steps 2 & 3 for your other script. You only need to change this

Let me know what are your thoughts if you like the new Azure portal.
 Previous Post
 Next Post
WONDERFUL Post.thanks for share..extra wait .. ?