Installing & Configure ESXi 5.5 on Dell R320 Server
Today, I share with you a full documentation on how to install and configure a Dell Server with ESXi VMware (instead of Hyper-V). We will install the host on 2 SD (mirrored) for better performance & reliability and finish with a Windows Server 2012 r2 install.
First thing we need to check is the firware version of our Dell Server. I am not going to give too much details about it but follow this link here. So when you are ready let’s take a look at our Raid Controller and its redundancy.
1. Preparation
1.1 Raid Controller
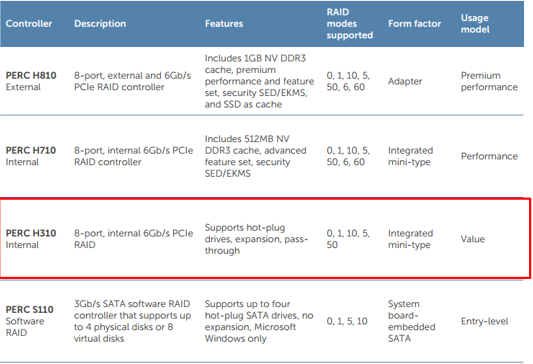
So what does it tell us ? Well we can use this H130 and do a cheap RAID 5 or 10. In my case it will be a RAID 5 with 3 Disks.
Let’s power on our server and press Ctrl+R to enter into RAID configuration.
Then navigate to the top tree (PERC H310 Mini) and press F2 > Create New VD
Select RAID type and press enter to change it as RAID5.
Select your disk with space bar.
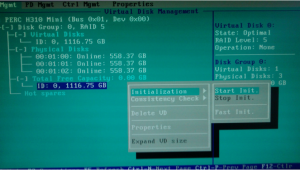
Select advanced settings to initialize the disk then select OK.
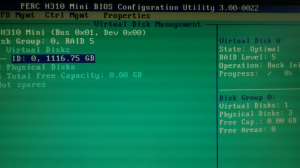
You should be able to see progress of initialisation under Virtual Disks on the right side (such as on the screenshot)
You can choose to Initialize Raid as bellow
1.2 Memory Testing
In order to make sure that memory is not failing and well inserted in slots you should use Dell PowerEdge Diagnostic to run Memory test.
I will not describe the whole process but you can find a very well detailed document here.
1.3 Enabling SD Mirroring
Let’s place the 2 SD card as below
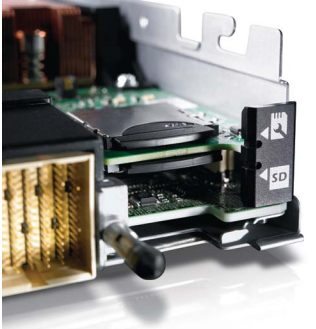
Then enable it in the BIOS. Go to Integrated Devices section > Redundancy
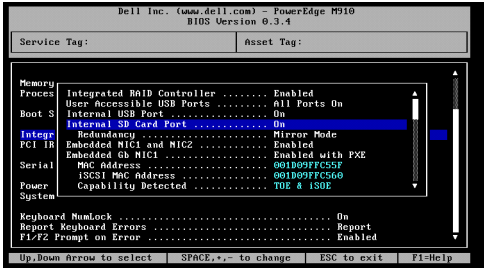
Save your configuration and restart server.
2. Installing ESXi
Bring a USB stick and create a USB bootable device with ESXi (ISO image is available here.)
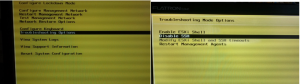
2.1 Enable SSH and ESXi Shell
Go to Troubleshooting Options and enable both SSH and ESXi Shell so we will be able to use SSH to connect remotely (I also created a SSH Tunnel with Putty in order to forward 443, 902 and 903.)
2.2 Change your network configuration
Change the network configuration with a static IP in the network range.
Modify also your DNS.
Run these commands to change the hostname in ESXi 5.x using the command line:
- esxcli system hostname set –host=hostname
- esxcli system hostname set –fqdn= fqdn
2.3 Installation of Megaraid Driver for SAS Disk
In order to have the latest driver for ESXi, download VMware ESXi 5.5.1 for Dell RAID PERC h310: https://my.vmware.com/ and upload it via ssh into your ESXI server.
Copy the VIB or offline bundle to the ESX server. Technically, you can place the file anywhere that is accessible to the ESX console shell, but for these instructions, we’ll assume the location is in ‘/tmp’.
Then run command esxcli software vib install -v /tmp/<VIB NAME>
![]()
3. Installing vsphere on client
Vsphere makes your life easier in order to configure, access and manage host & VMs remotely.
Open a browser and use the IP of the host you previously setup in part 2.2. Once at the page, download the client program and process with installation.
3.1 Configure Storage
Connect to your host via vsphere by using root credentials then go on Configuration > Storage> Datastore and click on Add storage
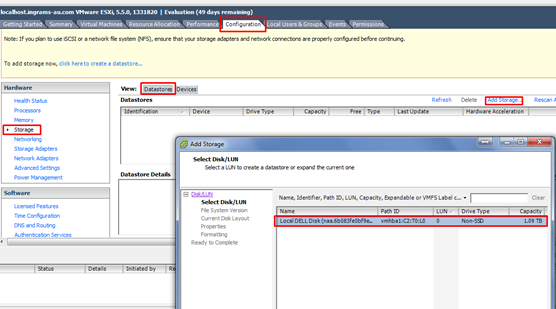
Select your disk and click on next.
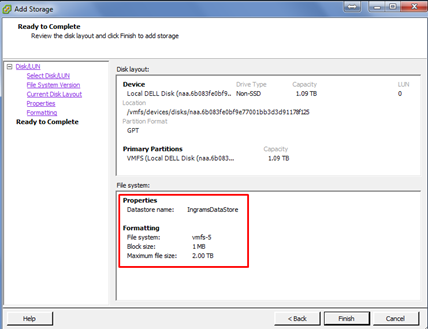
Click on Finish.
![]()
You can see your progress at the bottom of the window.
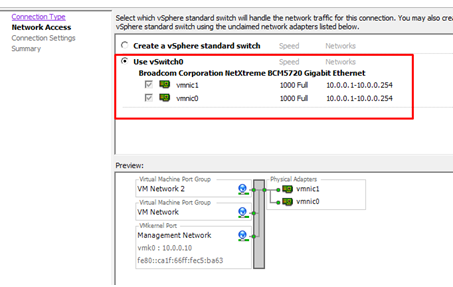
3.2 Configure NIC as redundant team
Click on configuration > Networking then select Virtual Machine
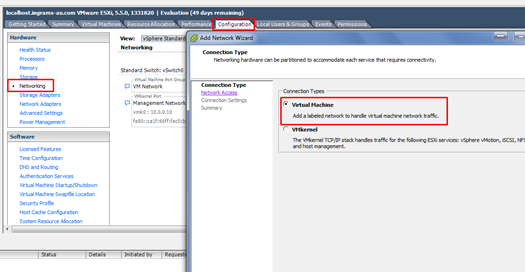
Select the vswitch with 2 NIC.
4. Install & configure OpenManage
OpenManage is a Dell Software that you can use to diagnostic and setup alarms against Hardware issues.
4.1 Install on ESXi
Download vib via the official Dell Website.
Transfer the vib file to ESXi (FTP or SFTP) and Connect via SSH or on console directly.
Then execute command esxcli software vib install -d /tmp/<VIB NAME>
Reboot the server to complete the installation.
4.2 Access with a client
- Port in use is 1311. I suggest to forward this port on your router to ESXi IP.
- Download the installer for Dell OpenManage Server Administrator Managed Node (Windows),v7.3 to a Windows PC.
- Run and install the application.
- The installer will complain about it not being installed on Dell software but you can proceed with the server installation only.
- Dell OMSA is web-based, relying on a Java back-end so when you double click the icon on your desktop it will open your default browser.
- Enter the ESXi host, user name and password. Check the box to Ingore certificate warnings.

Note: There is also an Android app on the Google Store here
5. Install of Windows Server 2012 r2 from Dell Media
5.1 Setting up Windows Server 2012 r2 via Vsphere
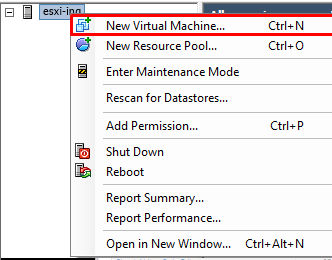
Once you are log on Vsphere, press Ctrl+N to create a new Virtual Machine
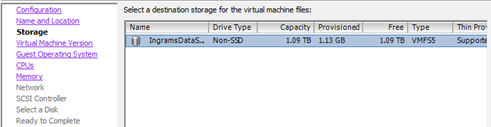
Give it a name and pick a DataStorage where you will install the VM.
Select Virtual Machine version 8 and OS Windows Server 2012 64Bits
Now we have to setup CPU and Memory, let’s have a look at our hardware configuration to know what we can use
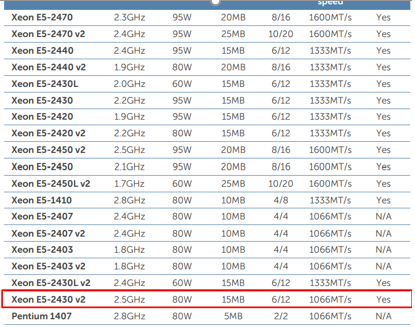
Our CPU has 6 physical core so we can easily use 2 for this VM as this is not going to be an heavy server.
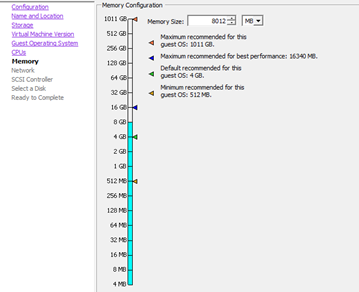
I have 16GB in total, as a starter I choose to dedicate 4GB for this VM.
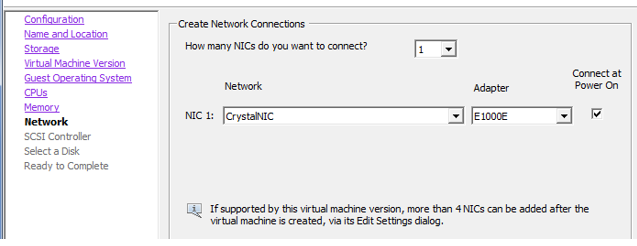
I selected the NIC that I already configured as a team
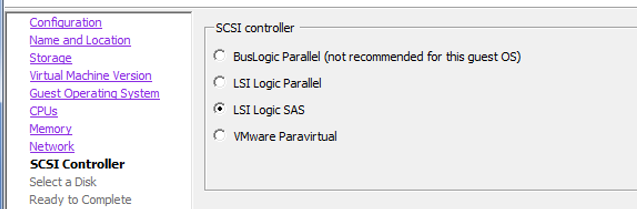
SCSI Controller is the one by default
And finally, let’s select the disk options

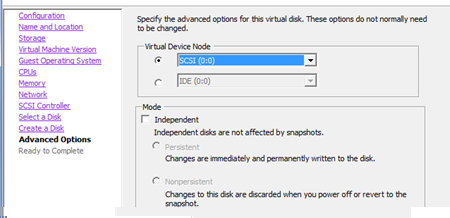
Click on next and create the VM.
![]()
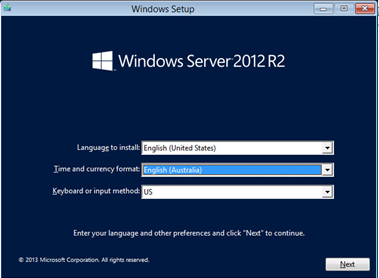
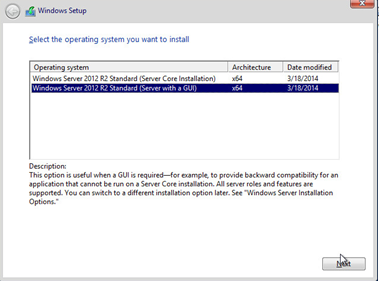
5.2 Install Windows Server 2012 r2
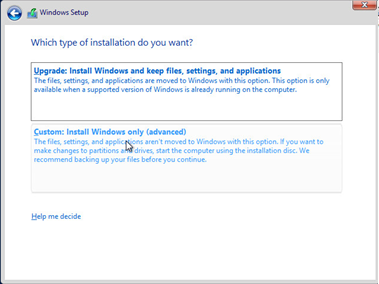
Select custom Install Windows only (advanced)
Create a partition

When installation complete server will restart by itself
6. Configure Windows Server 2012 r2
First thing I like to do is to configure the network configuration with a static IP and eventually a specific DNS server.
6.1 Setup Remote Desktop
Allow Remote Desktop can be easily done by accessing to the Server Manager.
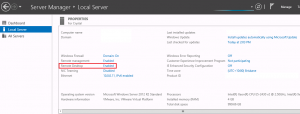
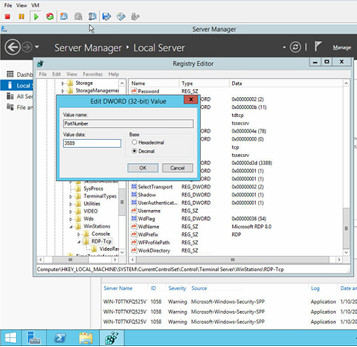
RDP port is 3389 by default and I’d like to change it so let’s modify register key HKEY_LOCAL_MACHINE\System\CurrentControlSet\Control\TerminalServer\WinStations\RDP-Tcp\PortNumber as bellow
Open firewall rule for IN/OUT via windows firewall and do not forget to restart your server!
6.2 Join an existing Active Directory domain
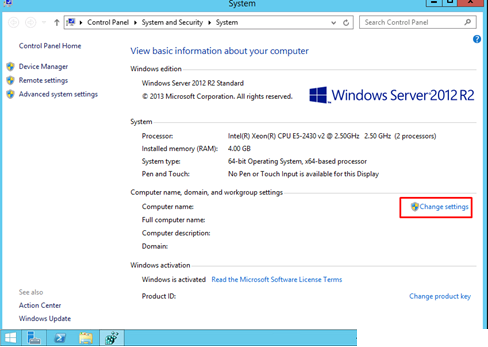
Right click on Start menu > System
Then click on Change Settings.
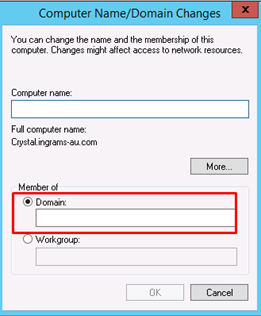
Restart your server again!
You are now ready for deploying Server role on your new VM.
7. Extras
Finally I just wanted to share a couple of tips that I used during this installation.
7.1 Set your VM with NTP Service
From vsphere client go on configuration>Software>Time configuration
7.2 Convert VMware ESXi Thick Provisioned Disk to Thin
Here is the source of the original article which helped me in using the vmkfstools command
Cd /vmfs/volumes/<ID OF VOLUME>/<NAME OF VM> vmkfstools -i <NAME OF DISK>.vmdk -d thin <NEW NAME THIN>.vmdk
![]()
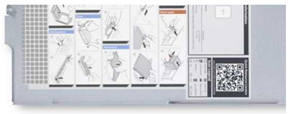
7.3 Troubleshooting issues on R320 Dell Server
You can scan QR code located at the back of the server which will help you to find driver/LCD diagnostic/contact support…)
 Previous Post
 Next Post